Pin It
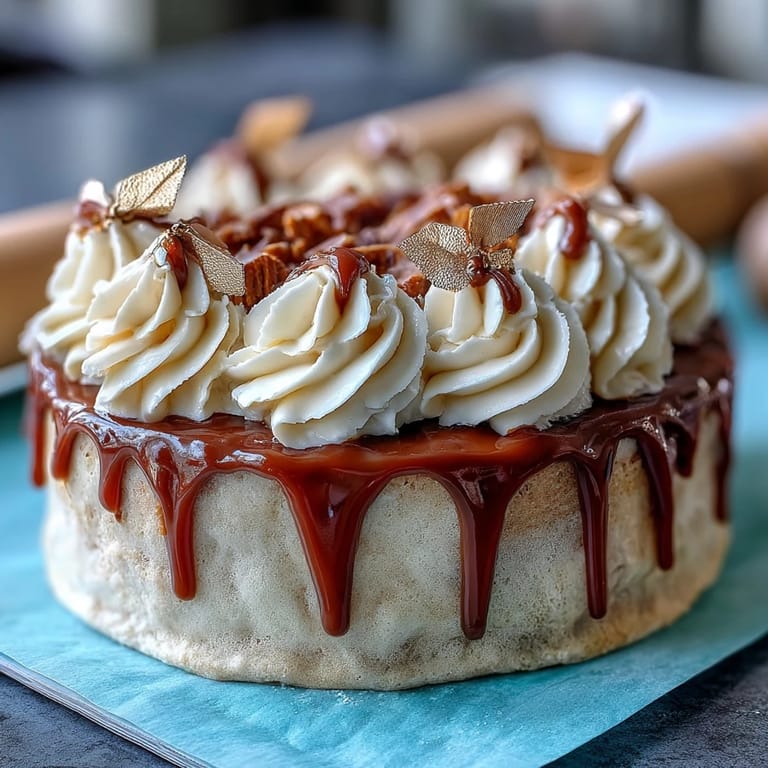
 My cousin called me three weeks before graduation asking if I could bake her cake, and honestly, I panicked. Then she mentioned wanting something with gold accents and a diploma topper, and suddenly I was picturing it perfectly—this elegant, celebratory cake that felt grown-up enough for the milestone but still fun enough to remember. The vanilla sponge would be soft and buttery, the buttercream silky, and those delicate gold foil sheets would catch the light like tiny treasures scattered across the frosting.
I tested this recipe the week before my cousin's graduation party, and my family became my taste testers whether they liked it or not. My dad kept sneaking forkfuls of crumb coat frosting, my sister took approximately forty photos of the gold foil application, and my mom insisted on adding sprinkles in the school colors even though I'd planned to keep it minimal. By the time the real cake came out of the oven, the kitchen smelled like butter and vanilla, and everyone stopped what they were doing just to watch me decorate.
Ingredients
- All-purpose flour (2 ½ cups): This is your cake's foundation, and measuring it correctly makes the difference between a tender crumb and a dense, heavy cake—spoon it into the measuring cup and level it off rather than scooping directly from the bag.
- Baking powder (2 ½ tsp): It gives the cake its lift and airy structure, so make sure yours is fresh and hasn't been sitting in the back of your cabinet for two years.
- Salt (½ tsp): A tiny pinch that rounds out the sweetness and makes the vanilla flavor pop, which is easy to forget but absolutely worth including.
- Unsalted butter (1 cup for cake, 1 ½ cups for frosting): Softened butter creams into the sugar beautifully, creating that light, fluffy texture that makes the cake feel special rather than dense.
- Granulated sugar (2 cups): This sweetens the cake and helps create a tender crumb when beaten with the butter—those few minutes of creaming time really matter.
- Eggs (4 large, room temperature): Bringing them to room temperature helps them incorporate smoothly into the batter, which creates a more cohesive, tender cake.
- Vanilla extract (1 tbsp cake, 2 tsp frosting): Use quality vanilla if you can—it's the star flavor here and shouldn't be skipped or substituted with imitation extract.
- Whole milk (1 cup cake, 3–4 tbsp frosting): Room temperature milk blends seamlessly with the batter and gives the cake a subtle richness and moisture.
- Powdered sugar (5 cups): For the frosting, and it must be sifted or the buttercream will have little lumps that catch under your offset spatula.
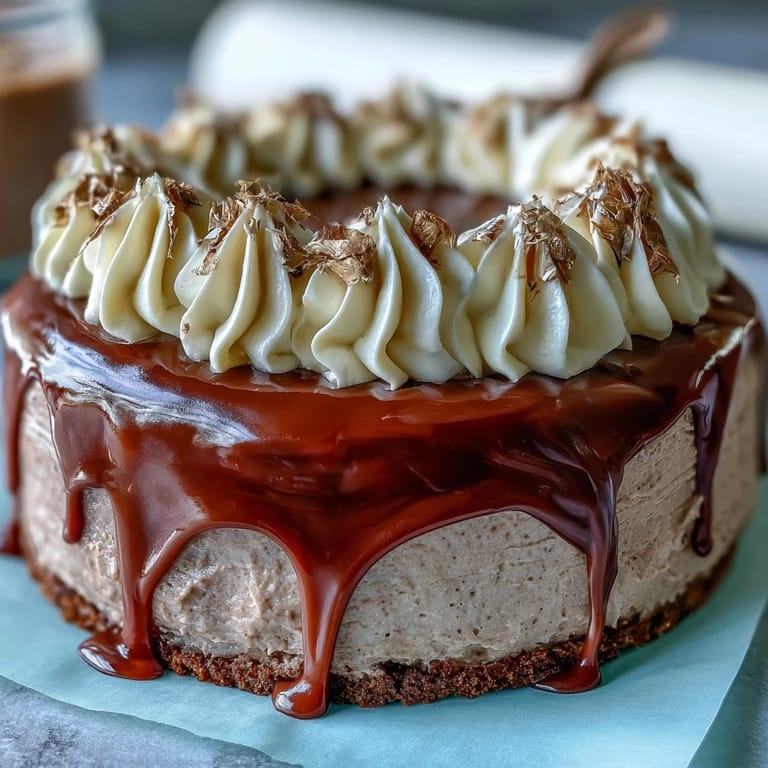
- Edible gold foil sheets: These delicate treasures are handled best with dry hands or tweezers, and they transform a regular cake into something that feels like you spent hours decorating when you actually spent minutes.
- Diploma-shaped cake topper: Store-bought versions save time, but fondant toppers you make yourself add a personal touch that guests always comment on.
Tired of Takeout? 🥡
Get 10 meals you can make faster than delivery arrives. Seriously.
One email. No spam. Unsubscribe anytime.
Instructions
- Prepare your baking stage:
- Preheat the oven to 350°F and line two 9-inch round pans with parchment paper—this small step prevents sticking frustration later and makes turning out the cakes feel effortless. Grease the pans generously so the parchment stays in place while you pour the batter.
- Mix your dry ingredients:
- Whisk together the flour, baking powder, and salt in a medium bowl, which aerates the flour and distributes the leavening evenly throughout the cake. Set this aside and take a breath—you've got this.
- Cream butter and sugar:
- Beat the softened butter and sugar together on medium-high speed for 3 to 4 minutes until the mixture looks pale, fluffy, and almost like whipped frosting. This step is crucial because you're incorporating air bubbles that will make the cake light and tender rather than dense.
- Add eggs thoughtfully:
- Add one egg at a time, beating well after each addition so the egg fully incorporates before you add the next one. This prevents the batter from looking curdled or broken, which can happen if you dump all the eggs in at once.
- Incorporate vanilla:
- Stir in the vanilla extract after the eggs are fully mixed in, letting that rich flavor distribute throughout the batter. Take a moment to smell it—that's the scent of celebration right there.
- Alternate wet and dry:
- Add the flour mixture and milk alternately, starting and ending with flour, mixing until just combined after each addition. Overmixing at this stage develops gluten and makes the cake tough, so stir gently and stop as soon as you don't see dry streaks.
- Divide and smooth:
- Pour the batter evenly between the prepared pans and smooth the tops with a spatula so they bake evenly. Even baking means level layers, which makes frosting and stacking feel less like engineering and more like decorating.
- Bake until golden:
- Bake for 28 to 32 minutes until a toothpick inserted in the center comes out clean or with just a few moist crumbs. The kitchen will smell absolutely incredible, and that's your signal that graduation dessert is on its way.
- Cool with patience:
- Let the cakes cool in the pans for 10 minutes so they set slightly, then turn them out onto wire racks to cool completely. Cooling completely is non-negotiable—warm cakes will melt the frosting and make decorating a sticky mess.
- Make the frosting:
- Beat the softened butter on high speed for about 3 minutes until it's pale and creamy, then gradually add the sifted powdered sugar so it mixes in smoothly without flying everywhere. Add vanilla, salt, and milk a tablespoon at a time until the frosting reaches a smooth, spreadable consistency.
- Level and layer:
- If your cake layers aren't level, use a serrated knife to gently trim the domed tops so they stack evenly. Place one layer on your serving plate, spread a generous layer of buttercream on top, then place the second layer over it like you're building something precious.
- Apply crumb coat:
- Spread a thin layer of frosting around the entire cake, which traps crumbs and creates a clean canvas for your final frosting layer. This step feels tedious but absolutely prevents crumbs from getting stuck in your beautiful final frosting, so don't skip it even though you'll be tempted.
- Chill strategically:
- Pop the crumb-coated cake into the refrigerator for 30 minutes so the frosting sets and becomes a stable base for the next layer. Use this time to calm yourself and maybe steal a taste of leftover frosting.
- Frost smoothly:
- Apply the remaining buttercream with an offset spatula, working in smooth strokes and rotating the cake turntable if you have one. Don't worry about perfection—the gold foil will cover any rough patches and actually make them look intentional.
- Apply edible gold foil:
- Using tweezers, carefully pick up pieces of gold foil and press them gently onto the frosting in a scattered, artistic pattern around the cake. The foil is delicate and will tear, but that's part of its charm—torn edges look like brushstrokes.
- Add the diploma topper:
- Place the diploma topper at the center or side of the cake, positioning it so it's the obvious focal point. If you're using sprinkles or confetti, add them now in the spots where they'll frame the topper without covering it.
- Set and serve:
- Chill the finished cake briefly to set everything in place, then bring it to room temperature before serving so the frosting tastes creamy and the cake is tender. Your masterpiece is ready.
 Pin It
 Watching my cousin cut into this cake at her graduation party felt like watching someone open a gift I'd spent hours wrapping. The gold foil caught the light as she sliced it, the vanilla sponge was perfectly tender, and the buttercream tasted like celebration itself. That moment reminded me that fancy desserts aren't about having professional skills—they're about caring enough to try, and that always shows.
Customizing with School Colors
One of the easiest ways to make this cake feel personal is by tinting the buttercream with gel food coloring in your grad's school colors. Gel coloring is better than liquid food coloring because it doesn't thin out the frosting or make it look watery—just add a tiny dot of color and stir until it's evenly distributed. I've made this cake three times now in different color combinations, and each time it feels like a completely different cake even though the base recipe stays the same.
Making Your Own Fondant Diploma
If you want to skip the store-bought topper and make something truly custom, fondant is your friend and it's actually easier to work with than people assume. Roll out a small piece of fondant, cut or shape it into a diploma scroll, and use edible markers to write the grad's name and graduation year on it—suddenly the cake feels completely personalized. A few friends have asked me how I got such a perfect topper, and when I tell them it's homemade fondant and markers, they're always surprised at how simple it was.
Timing and Make-Ahead Options
This cake is actually forgiving if you need to spread the work across a couple of days, which takes the stress out of party prep. You can bake the cake layers up to two days ahead and store them wrapped in plastic wrap at room temperature, make the frosting a day in advance and refrigerate it, then decorate everything the morning of the party. Just remember that edible gold foil is best applied the day of serving so it stays shiny and pristine, and keep the finished cake in a cool spot away from direct sunlight so the frosting doesn't get soft or the foil doesn't tarnish.
- Bake layers up to two days ahead and store wrapped in plastic wrap at room temperature.
- Make buttercream frosting one day ahead and refrigerate, then let it soften slightly before using.
- Apply gold foil and decorate the morning of the party so everything looks fresh and luminous.
 Pin It
 Baking a cake like this for someone celebrating a milestone is one of those things that sounds complicated but actually feels quite natural once you get going. It's a way of saying you believe in them and their future without saying a word, and that's the real reason this cake matters.
Recipe FAQs
- → How do I apply edible gold foil without tearing it?
Use tweezers to gently lift and place the gold foil onto the frosting. Ensure hands are dry and avoid touching the foil directly to prevent tearing.
- → What makes the vanilla sponge moist and tender?
The balance of softened butter, eggs at room temperature, and milk combined carefully results in a moist and tender crumb.
- → Can I customize the buttercream color?
Absolutely, gel food coloring can be added to the buttercream to match school colors or any desired theme.
- → How long should the cake be chilled before decorating?
After applying a crumb coat, chill the cake for about 30 minutes to set the frosting before adding final decorations.
- → What are some alternatives for the diploma topper?
You can create a home-made topper with fondant and edible markers or purchase pre-made toppers to suit your style.
- → Is this cake suitable for vegetarians?
Yes, this cake contains no meat products and uses vegetarian-friendly ingredients.