 Pin It
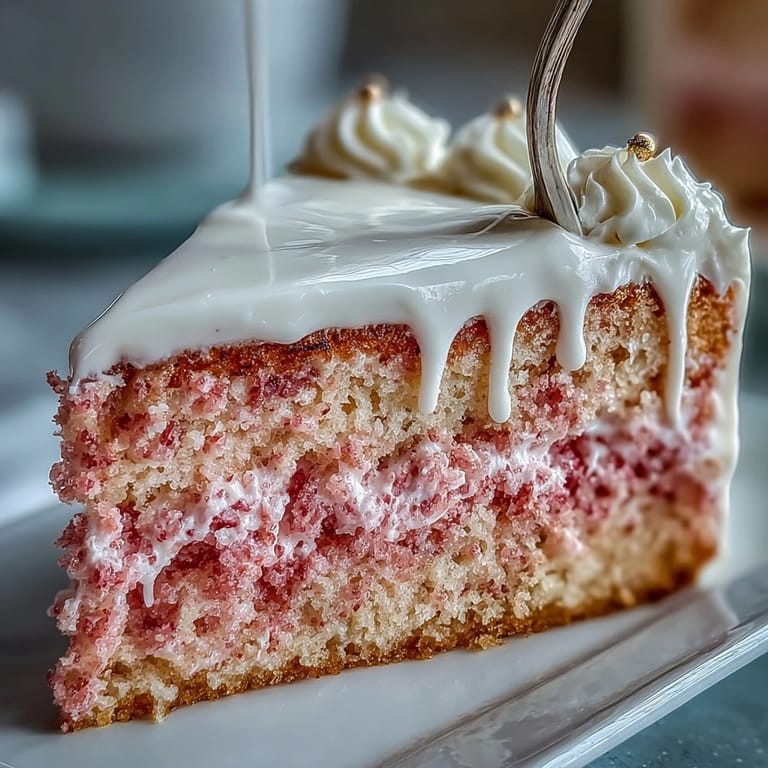
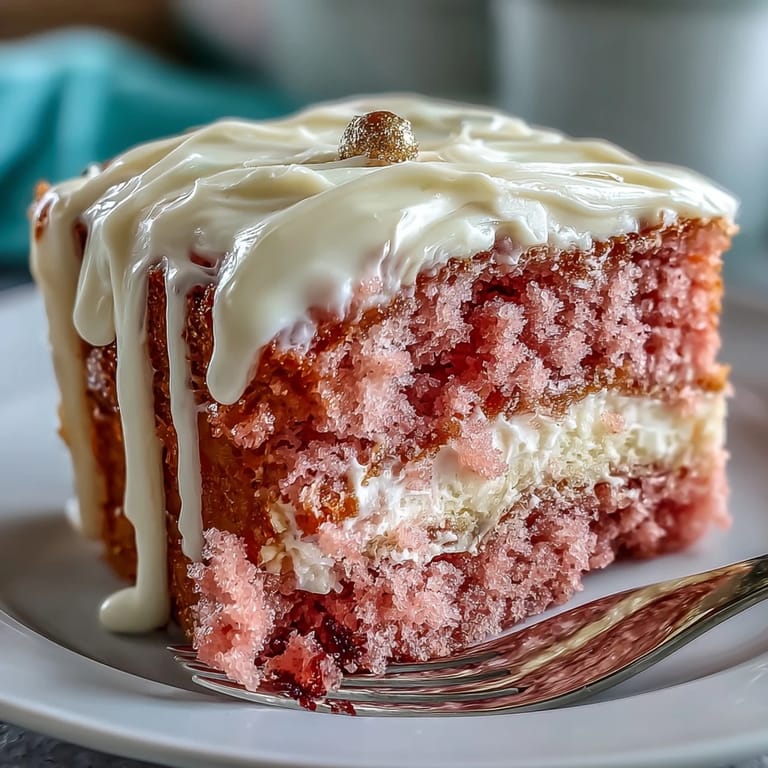
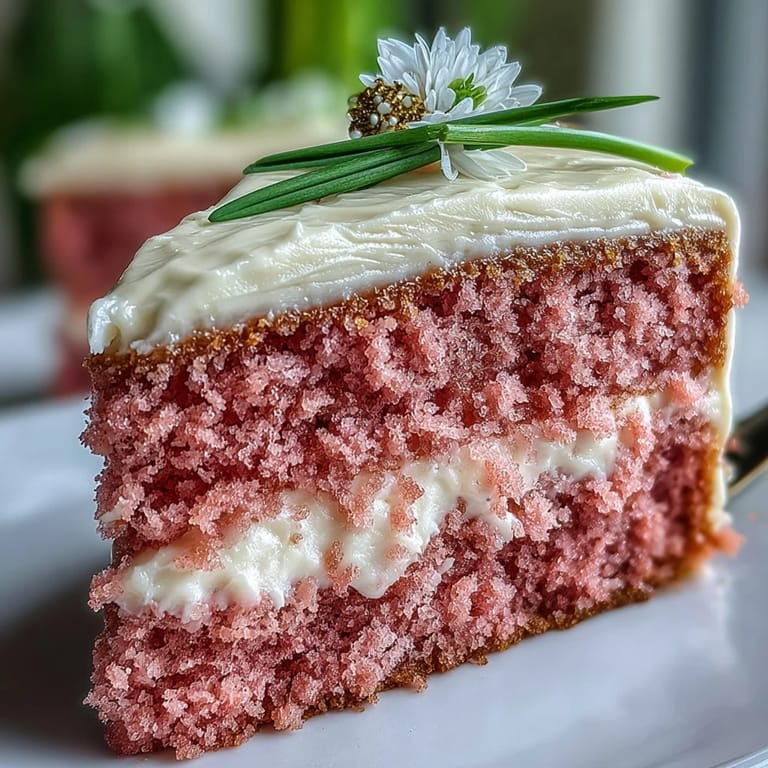
 The gentle clink of rosé glasses and the flutter of laughter echoed through my kitchen the first time I whipped up this Rosé Velvet Cake, its soft pink hue as festive as the moment. Preparing it felt like orchestrating a little celebration in itself, the perfume of wine mingling with vanilla and cocoa while ribbons of batter turned rosy in the bowl. There is something joyful about the way edible gold dances along the drips, transforming a simple cake into a showstopper fit for a bridal shower. Decadent but delicate, it’s the sort of dessert that makes people linger at the table for just one more slice. And honestly, the excitement of painting on edible gold never really fades—no matter how many times I make it.
I still chuckle thinking back to the shower where I first brought this cake out on a lopsided cake stand, friends gathering around, phones ready, the bride-to-be beaming under a crown of flowers. The pink velvet layers stood tall under their golden glaze, and our laughter warmed the room while we argued over who got the slice with the prettiest drip. It was the sort of moment where the dessert really did become the centerpiece, not just for its looks but for the sweet memories we made together.
Ingredients
- All-purpose flour: Go for a gentle touch when measuring—sifting first ensures the cake stays light rather than dense.
- Cornstarch: Just a little makes the crumb soft, giving the layers that melt-in-your-mouth velvet texture.
- Unsweetened cocoa powder: It may seem small, but this hint is crucial for depth; sift to avoid any lumps.
- Baking soda: Helps the cake rise with just enough lift to keep the crumb delicate.
- Salt: Don’t skip it—salt amplifies the flavors and balances the sweetness in both cake and frosting.
- Unsalted butter: The key to richness; let it come to room temperature for creaminess when beating with sugar.
- Granulated sugar & light brown sugar: Both add sweetness, but the hint of molasses from brown sugar deepens flavor and moisture.
- Large eggs: Room temperature eggs prevent a curdled batter and help everything blend beautifully.
- Rosé wine: Choose a fragrant pink wine—it’s not just for color, but for subtle aroma and fruitiness in every crumb.
- Buttermilk: Brings tang and tenderness, a non-negotiable for classic velvet cakes in my book.
- Vanilla extract: Adds that floral hint that makes both the cake and frosting sing.
- Pink gel food coloring (optional): For that picture-perfect blush hue—you can adjust or skip for subtler color.
- Cream cheese: Classic for frosting; always soften it so your icing won’t turn lumpy.
- Confectioners’ sugar: Sifted is best; it keeps the cream cheese frosting cloud-like and smooth.
- White chocolate chips & heavy cream: These two form the luscious drip—stir slowly for a shiny, silky finish.
- Edible gold luster dust & vodka or lemon extract: This magical touch creates the gold drip; mix as paint, then brush on once the chocolate sets.
Tired of Takeout? 🥡
Get 10 meals you can make faster than delivery arrives. Seriously.
One email. No spam. Unsubscribe anytime.
Instructions
- Prep the cake pans:
- Grease and line three 8-inch pans—parchment rounds save you so much stress when it’s time to turn the cakes out.
- Sift and mix dry ingredients:
- Combine flour, cornstarch, cocoa powder, baking soda, and salt in a bowl; the cloud of cocoa always gets me sneezing.
- Cream butter and sugars:
- Beat butter with granulated and brown sugar until the color turns pale and it feels fluffy—listen for the soft whoosh of the mixer at work.
- Add the eggs and vanilla:
- Crack in eggs one by one, mixing well, then stir in the vanilla for an instant fragrance boost.
- Combine rosé and buttermilk:
- Whisk them together in a jug—the mix will look odd but trust me, it’s the secret to flavor and moisture.
- Alternate wet and dry:
- With mixer on low, add flour mix and rosé-buttermilk in turns, beginning and ending with flour; a few drops of pink gel food coloring add that dreamlike blush.
- Bake the cakes:
- Divide batter evenly, then bake until a toothpick comes out clean—your kitchen will smell like vanilla and celebration.
- Cool completely:
- Let the cakes rest 10 minutes in their pans, then gently transfer to a wire rack and cool before frosting.
- Make the cream cheese frosting:
- Beat softened cream cheese and butter until silky, then slowly add sifted confectioners’ sugar, vanilla, and a pinch of salt.
- Assemble and frost:
- Layer cakes with frosting, then cover the outside and smooth with a spatula; a little patience goes a long way here.
- Chill the cake:
- Place cake in the fridge for 30 minutes—this step keeps your gold drip neat and defined.
- Create the gold drip:
- Melt white chocolate chips and cream over simmering water until fluid, then gently spoon around the cake’s top edges and allow it to cascade down.
- Paint with gold:
- Mix luster dust with vodka or lemon extract and paint onto the set chocolate drips for a magical gilded look.
- Decorate as desired:
- Add edible flowers or gold leaf if you fancy; each flourish transforms the cake for the occasion.
 Pin It
 Seeing the bride’s eyes light up when she spotted the shimmering finish—her laughter, wide and genuine—made every careful brushstroke worth it. That day, the cake became more than just a dessert; it was a toast in butter, sugar, and gilt to new beginnings and old friendships.
Getting the Gold Drip Just Right
I’ll admit to a few practice runs where my golden drips ran wild and puddled on the plate. Let the white chocolate cool until just thickened, then test a drip on the side before committing. I like to use a small spoon and work slowly, turning the cake as I go to even things out. If you get a stubborn drip, dab it with a clean brush or smooth it with your fingertip. It’s surprisingly forgiving once you get the hang of it!
How to Make Cake Layers Even and Moist
One trick that changed my game: use a kitchen scale to divide batter so the layers bake up the same height. I let my layers cool fully on wire racks—never rush this, as residual warmth can turn your frosting into a slippery mess. Brushing each cake with a touch of rosé before stacking adds a subtle flavor boost and keeps things extra tender. Don’t skimp on parchment rounds; they’re worth every second. Between each step, pause for a clean counter—messy hands mean smudged cake!
Decorating Like a Pro Without Stress
I used to think fancy cakes were out of reach, but patience and a few simple gadgets go a long way. Offset spatulas make smoothing frosting so much easier, and a lazy Susan helps spin the cake for even sides. For the gold drip, work in good light—you’ll see every shimmer. Don’t worry if your drips aren’t perfectly spaced or identical, the homemade charm is half the fun. Decorating should bring a smile, not stress!
- If in doubt, start small with the edible gold (it’s easier to add than to take away).
- A piping bag with a large round tip can help with even layers of frosting.
- Keep your cake chilled between steps for crisp, photo-worthy finishes.
 Pin It
 Here’s to the little things that turn a gathering into a celebration—the scent of rosé velvet baking, a brush dipped in gold, and a table surrounded by friends eager for a slice. However you finish it, may this cake bring as much sparkle to your day as it has to mine.
Recipe FAQs
- → How does rosé wine affect flavor and texture?
A quality rosé adds bright, fruity aromatics and a subtle acidity that balances the butter and sugar. The liquid also contributes to tenderness when combined with buttermilk, yielding moist layers.
- → Can I make a non-alcoholic version?
Yes. Substitute equal parts pink grape juice or sparkling cider for the rosé to keep the color and fruity note while avoiding alcohol.
- → How do I achieve a stable cream cheese frosting?
Soften cream cheese and butter to room temperature, beat until smooth, then gradually add sifted confectioners’ sugar. Chill briefly to firm before piping or smoothing to maintain structure.
- → What’s the best way to control the gold drip?
Use a slightly cooled white chocolate ganache poured with a spoon or squeeze bottle to create controlled drips. Chill to set, then paint with luster dust mixed with a few drops of vodka or lemon extract for a metallic finish.
- → How should I store and serve the finished cake?
Refrigerate the frosted and decorated cake; remove it 30–60 minutes before serving to reach optimal texture. Leftovers keep 3–4 days refrigerated, well wrapped.
- → Any tips for getting an even pink hue?
Add gel food coloring a little at a time to the batter until you reach the desired blush. Alternatively, rely on the rosé and omit coloring for a subtler natural tint.