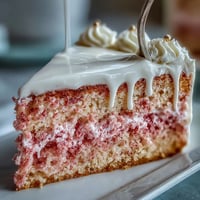
 Pin It
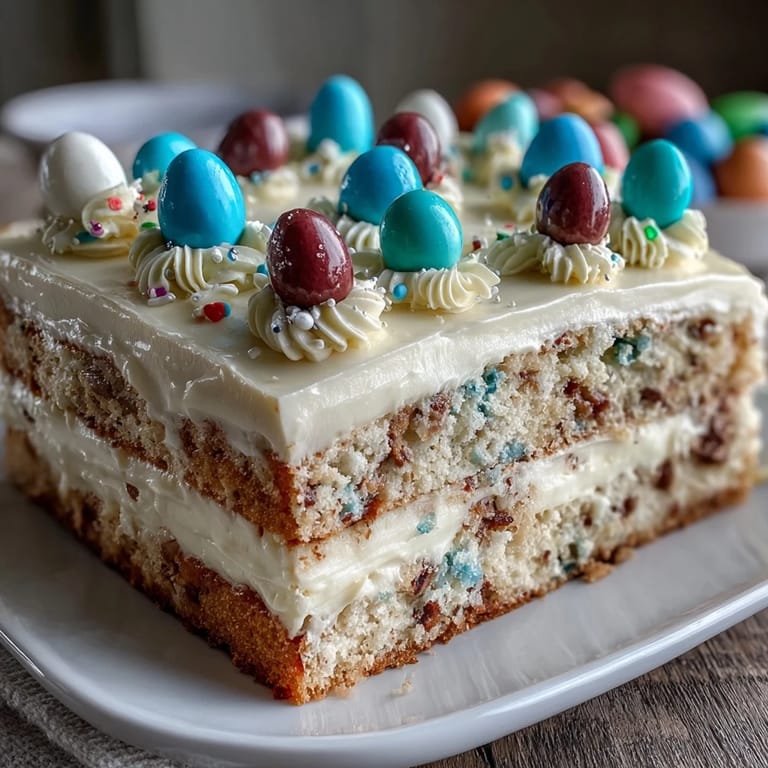
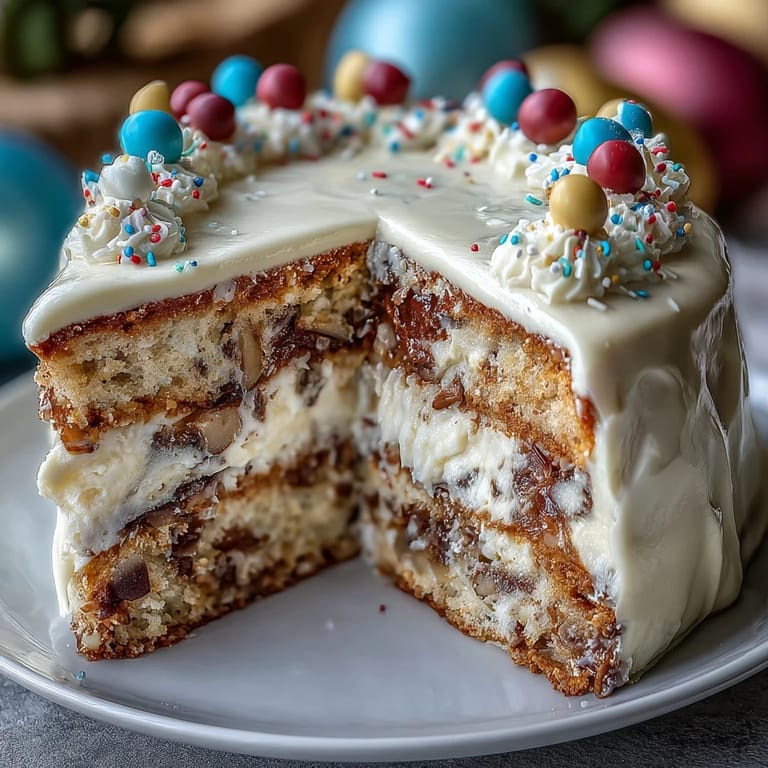
 My cousin called me three weeks before her graduation, voice breathless with that mix of excitement and panic only a soon-to-be graduate can manage. She wanted something special for her celebration dinner, something that would look as impressive as she felt stepping into this new chapter. I found myself standing in my kitchen that evening, thinking about how a two-tier cake could somehow hold all those feelings—the elegance of moving forward, the playfulness of finally exhaling after years of work. That's when I decided to create this vanilla cake with its delicate buttercream layers and whimsical balloon toppers, a cake that feels both sophisticated and joyful.
I'll never forget the moment I slid that finished cake onto the dessert table at my cousin's party. The afternoon light caught the frosting just right, and the colorful balloons swayed gently whenever someone walked past. A whole group of her friends gathered around it before anyone even cut a slice, phones out, making it the unofficial centerpiece of the evening. That's when I realized this cake does something beyond taste good—it makes people feel like they're part of something worth celebrating.
Ingredients
- All-purpose flour (4 1/2 cups): The foundation of your sponge; make sure it's sifted or whisked with the baking powder to avoid dense pockets of flour hiding in your finished cake.
- Baking powder (3 1/2 tsp): This is what gives the cake its tender crumb and makes it rise beautifully, so don't skip it or reduce it thinking you're being clever.
- Salt (1/2 tsp): A tiny amount that somehow makes the vanilla taste more like vanilla, trust me on this one.
- Granulated sugar (2 1/2 cups): Beaten with butter until pale and fluffy, this creates the air pockets that make your cake light rather than heavy.
- Unsalted butter (1 1/2 cups plus 2 cups for frosting): Room temperature is non-negotiable here; cold butter won't cream properly and your cake will suffer for it.
- Large eggs (8 eggs): Also room temperature, because they emulsify better and create a more stable batter that way.
- Pure vanilla extract (2 tbsp plus 2 tbsp for frosting): The difference between a cake that tastes generic and one that tastes like actual celebration is often just the quality of your vanilla.
- Whole milk (2 cups plus 1/2 cup for frosting): Room temperature milk incorporates smoothly into the batter without shocking the emulsion.
- Powdered sugar (8 cups): Sifted before measuring so you don't end up with dense, grainy frosting that feels gritty on your tongue.
- Gel food coloring (optional): If you're using the graduate's school colors, gel coloring won't thin out your frosting the way liquid coloring does.
- Balloon cake toppers: The playful touch that transforms this from elegant to unforgettable, available online or easy to make yourself with food-safe sticks.
Tired of Takeout? 🥡
Get 10 meals you can make faster than delivery arrives. Seriously.
One email. No spam. Unsubscribe anytime.
Instructions
- Get Your Station Ready:
- Preheat your oven to 350°F and take a moment to grease and line all four pans—two 8-inch rounds and two 6-inch rounds—with parchment paper so nothing sticks when you're not looking.
- Mix the Dry Ingredients:
- Whisk together your flour, baking powder, and salt in a medium bowl, making sure the baking powder is evenly distributed throughout.
- Cream Butter and Sugar:
- In a large bowl, beat your room-temperature butter and sugar together for 3 to 5 minutes until the mixture is pale, fluffy, and noticeably lighter than when you started—this step is where the magic of a tender cake begins.
- Add Eggs One by One:
- Add each egg individually, beating well after each addition so the emulsion stays stable and your batter stays smooth.
- Mix in the Vanilla:
- Stir in your vanilla extract, letting it distribute throughout the batter before you move forward.
- Alternate Your Additions:
- With the mixer on low speed, add the flour mixture and milk in three alternating additions, starting and ending with flour—this gentle approach prevents overmixing and keeps your cake tender.
- Divide and Pan:
- Divide the batter evenly between all four pans and tap each pan gently against the counter to release any trapped air bubbles that could create tunnels in your finished cake.
- Bake with Patience:
- Bake the 8-inch cakes for 35 to 40 minutes and the 6-inch cakes for 25 to 30 minutes, until a toothpick inserted in the center comes out clean or with just a few moist crumbs clinging to it.
- Cool Properly:
- Let the cakes rest in their pans for 10 minutes to set slightly, then turn them out onto wire racks to cool completely—rushing this step is how cakes break apart when you're trying to frost them.
- Make Your Frosting:
- Beat your room-temperature butter until it's creamy and pale, then gradually add your sifted powdered sugar, beating well between additions, before mixing in vanilla, salt, and milk one tablespoon at a time until you've achieved that perfect spreadable consistency.
- Tint if Desired:
- If you're using gel food coloring for the graduate's school colors, add it now and mix until the color is even throughout.
- Level and Layer:
- Place one 8-inch cake layer on your cake board, spread a layer of frosting across the top, then add the second 8-inch layer and repeat with the 6-inch cakes, creating two separate two-layer structures.
- Apply the Crumb Coat:
- Spread a thin layer of frosting over each cake tier to seal in any crumbs, then chill both tiers for 20 minutes so the frosting sets slightly.
- Frost with Confidence:
- Apply your final frosting layer to both tiers smoothly, using an offset spatula and a steady hand, remembering that a turntable makes this part genuinely easier if you have one.
- Stack Carefully:
- Center the 6-inch tier on top of the 8-inch tier, using cake dowels or food-safe straws inserted into the bottom tier for support so the top tier doesn't slowly sink throughout your celebration.
- Add the Celebration:
- Crown your cake with balloon toppers and sprinkle edible confetti or sprinkles around the base if you're feeling festive.
 Pin It
 The night of my cousin's graduation dinner, I watched her face when she saw the cake for the first time, and that moment made all the careful measuring and patient frosting worth it. She told me later that cutting into it with everyone gathered around, with those balloon toppers catching the light, felt like a ritual marking the exact moment everything changed—childhood officially ending, adulthood officially beginning.
Flavor Variations That Still Feel Celebratory
If plain vanilla feels too straightforward for your celebration, consider adding 1/2 teaspoon of almond extract or the zest of two lemons to the cake batter for something slightly more complex. I've also had success adding 1/2 teaspoon of coconut extract when the graduate is heading somewhere warm and tropical, or even a touch of maple extract for a subtler, earthier sweetness. The buttercream takes food coloring beautifully, so you can match the frosting to the graduate's favorite colors, their university colors, or their future plans—I once made a sunset-ombre frosting for someone heading to art school, and it felt like the cake knew their destiny before they did.
Timing and Make-Ahead Strategy
You can bake the cake layers up to two days ahead and store them wrapped tightly at room temperature, which actually makes assembly easier because the cakes are more stable when they're not fresh from the oven. The buttercream keeps in the refrigerator for up to five days, though I recommend letting it come back to spreading consistency before you attempt to frost if it's been chilled. The one thing you cannot do ahead is stack the final tiers more than a few hours before serving, because even with proper support, gravity eventually wins and your top tier will start its slow descent toward the bottom one.
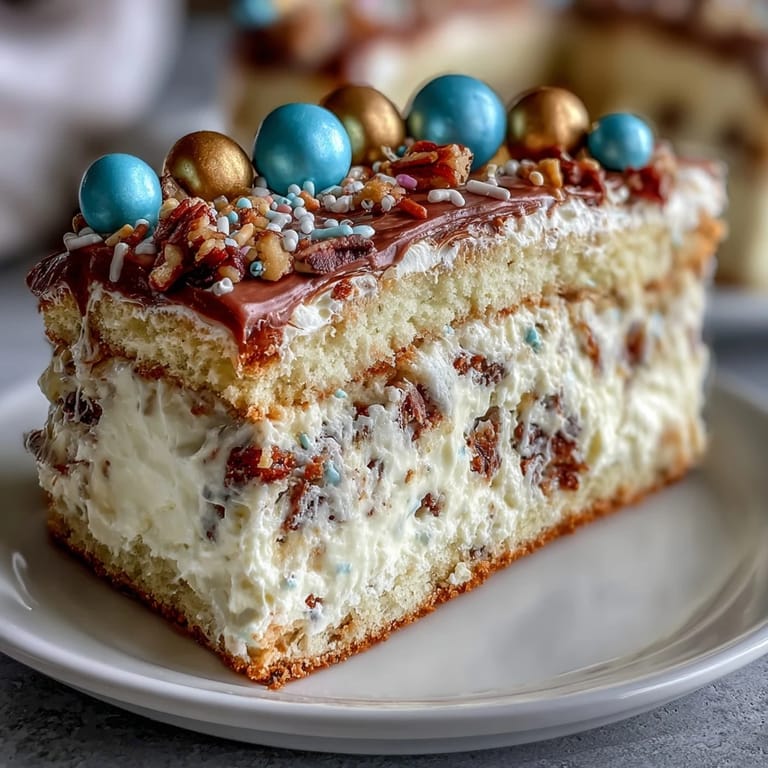
Decorating Tips That Go Beyond the Balloons
The balloon toppers are the showstopper, but the little details around them matter more than you'd think. Fresh flowers tucked between the tiers, a dusting of pearl luster dust mixed with edible glitter around the base, or even a simple ribbon wrapped around where the two tiers meet all add polish without requiring any special skills. I've also seen people write the graduate's name or year directly on the cake board with edible marker, turning the base into part of the celebration rather than just a platform.
- If your balloon toppers feel flimsy, add a small dab of food-safe adhesive to secure them so they don't tip forward during transport or display.
- Edible confetti looks better scattered loosely around the tiers than piled in one spot, and it catches light in a way that photographs surprisingly well.
- Consider the scale of your decorations against the size of your cake—delicate balloons suit the two-tier elegance, but oversized toppers might overwhelm the proportions.
 Pin It
 This cake has become my go-to celebration dessert because it manages to feel both elegant and joyful, which is exactly how graduation should feel. Every time I make it, I'm reminded that the best recipes aren't just about ingredients and techniques—they're about marking moments that matter.
Recipe FAQs
- → How do I ensure the cake layers bake evenly?
Use pans of the correct size and line them with parchment paper. Tap the pans gently before baking to release air bubbles, and use a toothpick test to check doneness.
- → Can I add flavor variations to this cake?
Yes, incorporating lemon or almond extract into the batter can add delightful flavor twists while maintaining the vanilla base.
- → What is the best way to assemble the two-tier cake?
Level the cake tops, apply a thin crumb coat, chill to set, then frost smoothly. Use dowels or straws for support when stacking the tiers.
- → How do I make the buttercream smooth and spreadable?
Beat the butter until creamy before adding powdered sugar gradually. Mix in vanilla, salt, and milk or cream slowly until achieving a smooth texture.
- → What decorations work best with this cake style?
Balloon toppers and edible confetti or sprinkles create a festive and playful look ideal for celebrations.