 Pin It
 My friend texted me a photo of her daughter's Halloween costume midway through October, and I immediately thought: those cookies need fangs. Not the store-bought kind that taste like sugar-coated cardboard, but something buttery and soft that actually melts on your tongue while looking delightfully sinister. I spent that afternoon testing the perfect way to make bite marks that didn't crack the cookie, discovering that a drinking straw worked better than I expected. What started as a quick decoration idea turned into an entire Halloween tradition at our house, complete with my partner making vampire jokes while I piped red icing.
I'll never forget setting these out at our neighborhood Halloween gathering and watching them vanish in waves. Someone's eight-year-old declared them the best cookies she'd ever seen, bite marks and all, and her mom asked for the recipe before the night ended. That moment—when a silly idea suddenly feels like you've created something people actually want to remember—that's when I knew these weren't just cookies.
Ingredients
- All-purpose flour (2 1/4 cups): This is your foundation, and scooping directly from the bag compacts it, so I always spoon and level for accuracy.
- Unsalted butter (3/4 cup, softened): Room temperature butter creams into the sugar properly—cold butter resists and leaves lumps that frustrate everything downstream.
- Granulated sugar (1 cup): The sweetness backbone; don't swap for brown sugar unless you want denser, chewier cookies.
- Egg (1 large): This binds everything together, so use one at room temperature for even distribution.
- Pure vanilla extract (1 1/2 tsp): Real extract matters here because imitation flavoring tastes thin against the buttery richness.
- Baking powder (1/2 tsp): This gives the cookies that tender, slightly cakey crumb instead of a dense sugar cookie texture.
- Salt (1/4 tsp): Even in sweet recipes, salt amplifies flavor depth without tasting salty.
- Powdered sugar (1 cup, sifted): Sift it before measuring or you'll end up with clumpy icing that won't flow through your piping bag.
- Milk (2–3 tsp): Add it gradually because you control the icing's consistency this way; too much and it runs off the cookie.
- Light corn syrup (1/2 tsp): This creates the glossy, wet-blood effect without using corn syrup, it looks matte and paste-like.
- Red gel food coloring: Gel colors don't thin your icing like liquid food coloring does, keeping the consistency pipeable.
Tired of Takeout? 🥡
Get 10 meals you can make faster than delivery arrives. Seriously.
One email. No spam. Unsubscribe anytime.
Instructions
- Preheat and prep your workspace:
- Heat your oven to 350°F and line two baking sheets with parchment paper. Cold baking sheets make a difference in how evenly the cookie bottoms brown.
- Combine your dry ingredients:
- Whisk together flour, baking powder, and salt in a medium bowl, breaking up any small clumps. This distributes the leavening evenly so every cookie rises the same way.
- Cream butter and sugar together:
- Beat softened butter with granulated sugar for about two minutes until the mixture looks pale and fluffy. You're incorporating tiny air pockets that make the cookies tender rather than dense.
- Add the wet ingredients:
- Crack in the egg and vanilla, mixing until everything comes together smoothly. Scrape down the bowl sides because small streaks of unmixed butter can lead to dry patches in your baked cookies.
- Bring the dough together:
- Gradually add your flour mixture on low speed, mixing just until no white streaks remain. Overmixing develops gluten, which hardens the cookies.
- Shape and bake:
- Scoop tablespoon-sized portions, roll them gently into balls, and flatten them slightly with your palm on the prepared sheets, spacing them two inches apart. Bake for ten to twelve minutes until the edges turn golden but the centers still look faintly underbaked—they firm up as they cool.
- Cool properly:
- Let cookies rest on the baking sheet for five minutes so the bottoms set, then transfer to a wire rack to cool completely. This prevents the bottoms from becoming soggy.
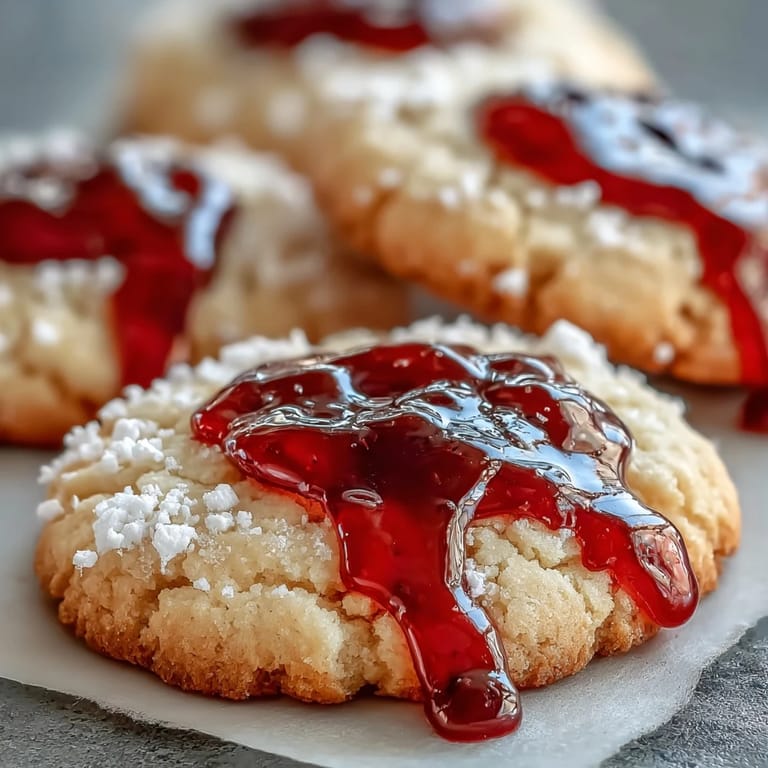
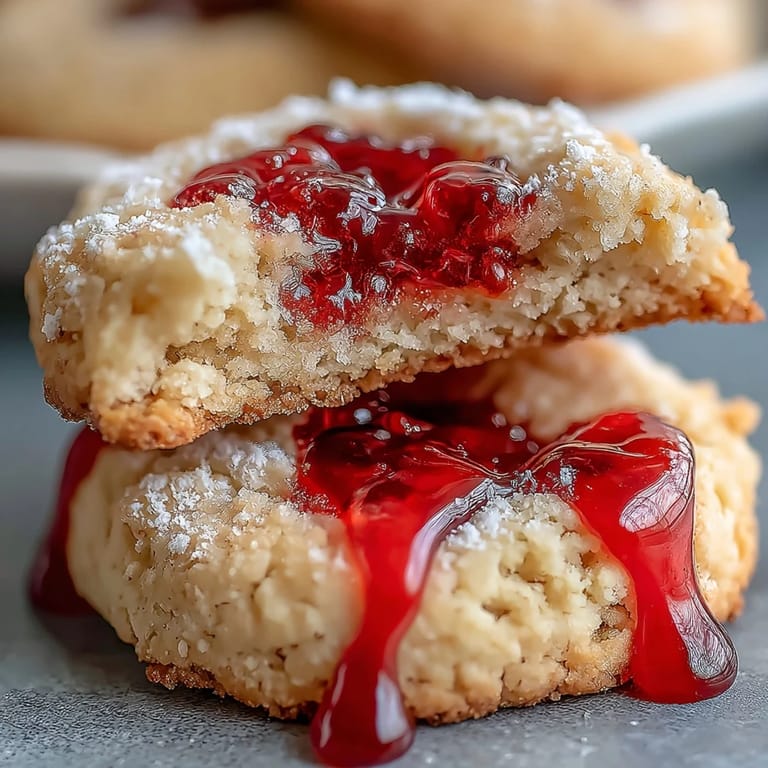
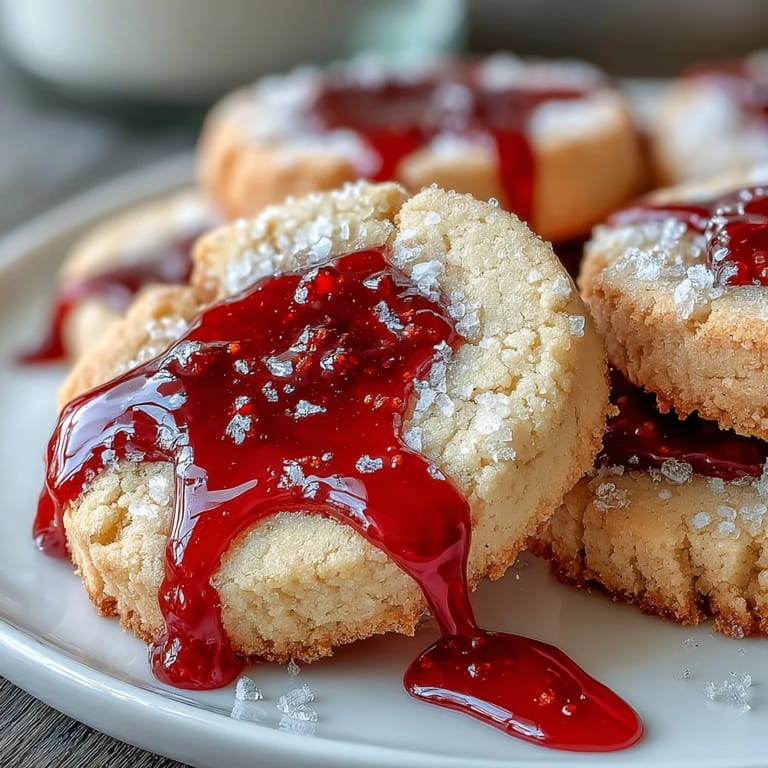
- Create the bite marks:
- Once cooled, use a clean drinking straw or chopstick end to gently poke two holes near the edge of each cookie, angling slightly downward. Press carefully; too hard and you'll crack the cookie.
- Mix your blood icing:
- Sift powdered sugar into a small bowl, then add milk one teaspoon at a time, stirring constantly until you reach a thick but pipeable consistency. Add corn syrup and red gel coloring, mixing until the color is even and deep.
- Fill the bite marks:
- Using a toothpick or small piping bag, carefully fill each bite mark with red icing, letting it drip slightly down the cookie's edge for that gruesome effect. A little trail of icing from the bites makes it look fresher and wetter.
- Add optional details:
- If you want extra drama, pipe thin lines of black or dark red icing around the bite marks for depth. Let everything set for at least thirty minutes before serving.
 Pin It
 There's something unexpectedly magical about turning a simple sugar cookie into a tiny edible story. My nephew asked if the vampire actually bit it, and instead of explaining food coloring and corn syrup, I just smiled and said maybe.
Timing and Make-Ahead Options
The beauty of these cookies is their flexibility. You can bake them up to three days ahead and store them in an airtight container, then decorate the morning of your party or event. If you're really pressed for time, you can mix and chill the dough the night before, scoop and bake the next morning, and ice them while they cool. I've even frozen the unbaked dough balls for up to a month—just add two extra minutes to the baking time straight from the freezer.
Flavor Variations to Try
The base recipe is wonderfully neutral, which means it plays well with additions. I've experimented with adding a quarter teaspoon of almond extract to make them taste like a classic Italian butter cookie, which pairs beautifully with the red icing for a more sophisticated look. Lemon zest works too if you want to lighten the flavor, or you could brown the butter before creaming it for a deeper, almost nutty undertone that surprises people in the best way.
Decorating Beyond the Bite
While the bite marks are the star, the icing itself becomes your canvas. Some people pipe tiny fangs pointing down from the top of the cookie, others add a glossy shine with extra corn syrup to make it look like fresh blood. You could also dust the cookies with edible glitter before the icing sets, or drizzle dark icing to look like it's trailing down the side. The vampire bite concept is flexible enough to match your mood and skill level.
- Let the icing set completely before stacking cookies, or the red will transfer to the one below.
- Bright red gel coloring looks more Halloween; dark red looks more elegant and less artificial.
- Keep extra red icing in a piping bag for last-minute touch-ups at the party.
 Pin It
 Making these cookies feels like creating a tiny edible costume, and somehow that transforms an ordinary afternoon into something theatrical and fun. They disappear faster than you'd expect, which is the highest compliment any cookie can receive.
Recipe FAQs
- → What makes these cookies soft and buttery?
The use of softened unsalted butter and a balanced amount of sugar contributes to a tender, moist texture with a rich buttery flavor.
- → How do I achieve the bite mark effect?
After cooling, gently poke two indentations near the cookie edges using a straw or chopstick to create characteristic bite marks ready to be filled with icing.
- → What ingredients create the glossy red icing?
The icing combines powdered sugar, milk, light corn syrup for shine, and red gel food coloring to form a thick, pipeable consistency perfect for dripping effects.
- → Is chilling the dough necessary?
Chilling for 30 minutes firms the dough, making it easier to handle and shape, especially in warmer environments.
- → Can I add extra flavors to the cookies?
Yes, adding 1/4 teaspoon almond extract enhances the flavor profile with a subtle nutty aroma.