 Pin It
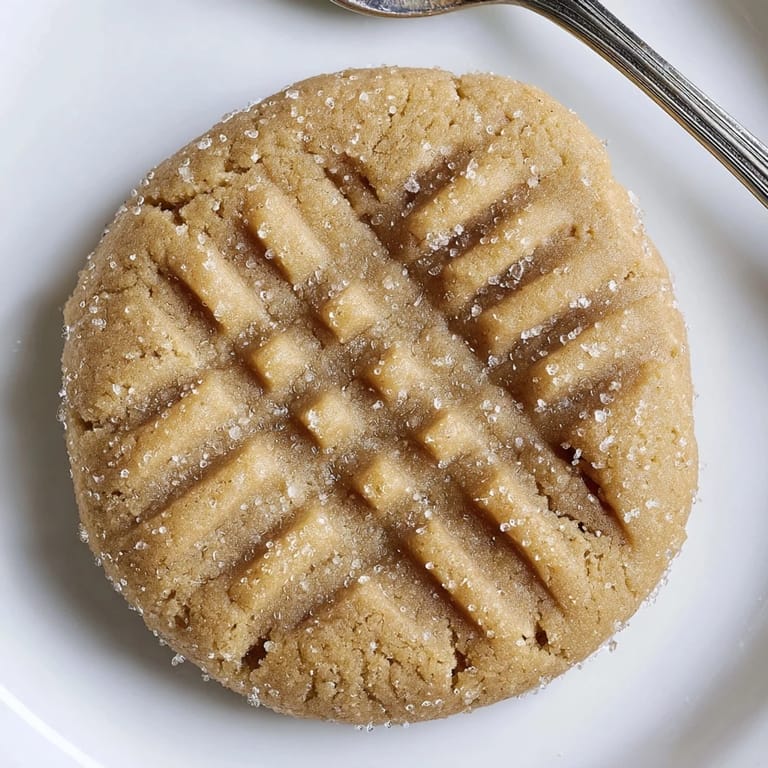
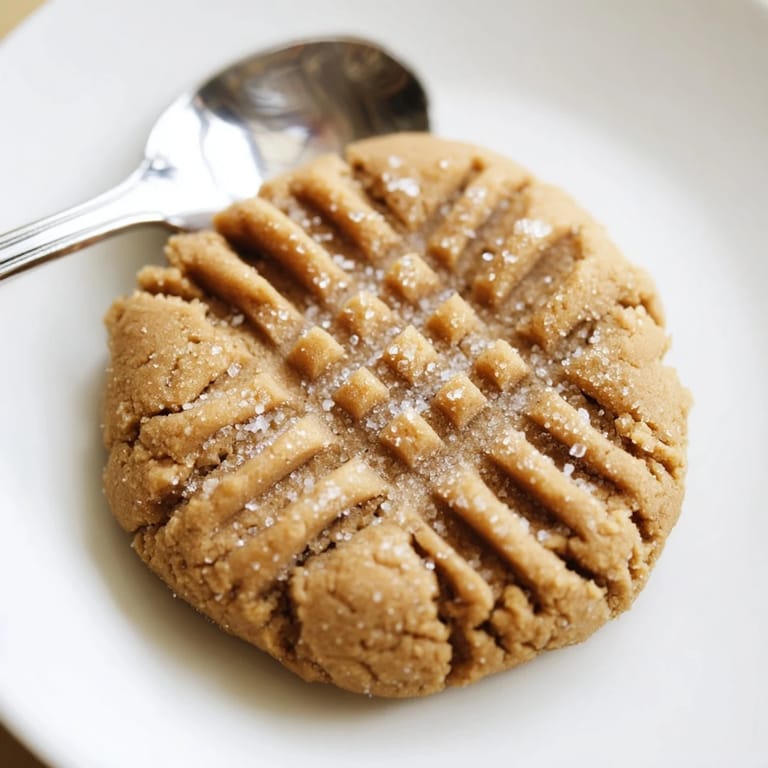
 My grandmother kept a jar of peanut butter cookies on the counter year-round, and I was convinced she baked them fresh daily. Years later, I realized she had a system—a simple dough that baked in under fifteen minutes. The first time I made them myself, the kitchen filled with that unmistakable warm, nutty smell, and I understood why she never needed a recipe written down. These cookies are soft in the middle, golden at the edges, and they taste like comfort tastes, if that makes sense.
I brought these to a coworker's potluck once, and someone asked if I'd bought them from a bakery. That moment taught me something: homemade cookies don't need to be fancy or complicated to impress people. They just need to taste genuine, which these do.
Ingredients
- All-purpose flour (1 1/4 cups): This is your structure—it keeps the cookies from spreading into one giant puddle while still letting them stay tender inside.
- Creamy peanut butter (1 cup): The star ingredient, and honestly, the quality matters here; use one you'd actually eat by the spoonful.
- Unsalted butter (1/2 cup, softened): Softening it beforehand is not a suggestion—cold butter won't cream properly and your cookies will be dense.
- Granulated and brown sugars (3/4 cup and 1/2 cup): The combination of both gives you sweetness and moisture; don't skip the brown sugar thinking they're interchangeable.
- Egg (1 large): This binds everything together and adds lift, so make sure it's at room temperature if possible.
- Vanilla extract (1 teaspoon): A small amount that rounds out the peanut flavor without announcing itself.
- Baking soda and baking powder (1/2 teaspoon and 1/4 teaspoon): These are your leavening agents—they help the cookies rise slightly and get that tender crumb.
- Fine salt (1/4 teaspoon): Don't omit this; it makes the peanut butter taste more peanutty.
Tired of Takeout? 🥡
Get 10 meals you can make faster than delivery arrives. Seriously.
One email. No spam. Unsubscribe anytime.
Instructions
- Set your stage:
- Preheat the oven to 350°F and line your baking sheets with parchment paper. There's something calming about doing this first—it signals to your brain that you're really baking.
- Mix your dry ingredients:
- Whisk the flour, baking soda, baking powder, and salt in a medium bowl until they're evenly combined. This prevents streaks of baking soda in your finished cookies.
- Cream the butter and sugars:
- Beat the softened butter with both sugars for about two minutes until the mixture looks light and creamy. You're incorporating air here, which makes the cookies tender—don't rush this step.
- Bring it together:
- Add the egg and vanilla, mixing until everything is smooth and cohesive. The mixture will look slightly curdled at first, then suddenly come together as you keep mixing.
- Fold in the dry mixture:
- Add the flour mixture gradually to the wet ingredients, mixing just until you don't see dry streaks anymore. Overworking develops too much gluten, and your cookies will be tough instead of chewy.
- Shape your cookies:
- Scoop about a tablespoon of dough per cookie and roll each into a ball. If you want, roll them in granulated sugar for a subtle sparkle and hint of crunch.
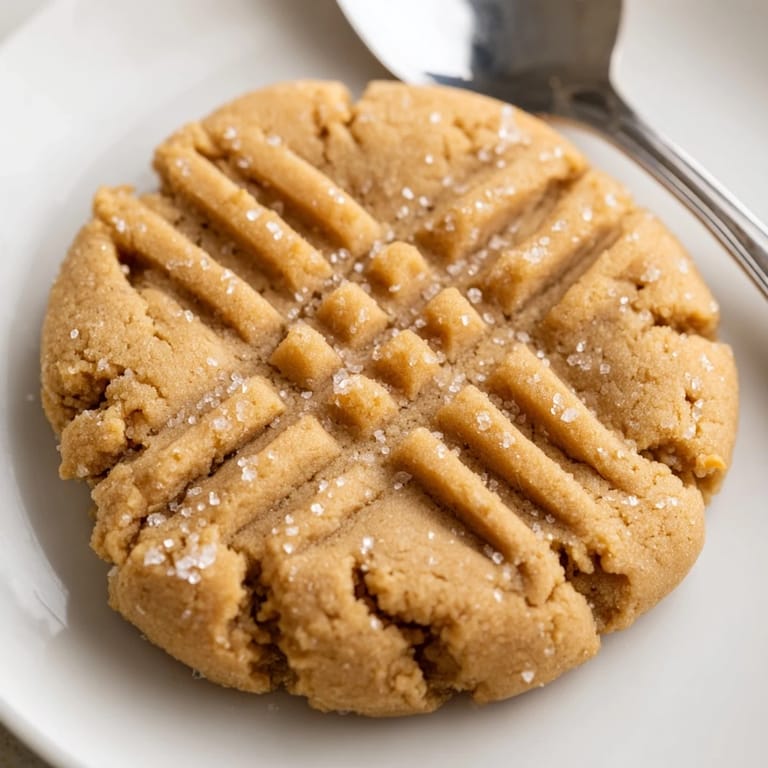
- Make the crosshatch:
- Place the dough balls on your prepared baking sheets about two inches apart, then use a fork to press down twice in a crisscross pattern. Press gently—you want to flatten them just enough to see the pattern without squashing all the air out.
- Bake with attention:
- Bake for ten to twelve minutes, watching for golden edges while the centers still look slightly underdone. They'll continue cooking on the hot baking sheet after you remove them from the oven.
- Cool with patience:
- Let them sit on the baking sheet for five minutes before transferring to a wire rack. This cooling period is crucial—it lets them firm up just enough to move without falling apart.
 Pin It
 There's a moment in the kitchen that happens quietly, usually when you're standing in front of the cooling rack. The cookies are still slightly warm, the smell is filling your whole house, and someone inevitably walks in and asks if they can have one. That's when you know you've made something worth making.
The Science of Chewy Cookies
The trick to keeping these cookies chewy instead of crispy is in the timing and the ratios. Brown sugar contains molasses, which adds moisture, so that combination of granulated and brown sugar isn't accidental. Similarly, pulling them out while the centers still look slightly soft means they'll set to chewy perfection rather than hardening into hockey pucks. It's the difference between a cookie you look forward to eating and one that feels like an obligation.
Variations Worth Trying
Once you've made these once and they turn out perfect, you might want to play around. Chunky peanut butter adds an interesting texture that some people prefer, though it can make the dough slightly harder to work with. A handful of chocolate chips stirred in before scooping turns these into something different but equally good. You could even add a pinch of cinnamon or nutmeg if you're feeling experimental, though start small—you don't want to mask the peanut flavor.
Storage and Keeping
These cookies actually improve as they sit because the flavors settle in and the texture becomes even more tender. Store them in an airtight container at room temperature and they'll last for several days, though that's rarely a problem in my house. If you really want them to last longer or need to bake ahead, they freeze beautifully for up to three months—just thaw them on the counter for a few minutes before eating.
- For crunchier cookies, bake an additional one to two minutes until the edges are more deeply golden.
- Serve with cold milk, hot coffee, or honestly just eat them straight from the cooling rack when no one's looking.
- If the dough seems too soft to scoop, refrigerate it for fifteen to twenty minutes and it'll be much easier to handle.
 Pin It
 These peanut butter cookies are the kind of recipe worth keeping close—simple enough to make on a random Tuesday, reliable enough to bring to a gathering, and genuine enough that people will ask you for the recipe. That's all you really need in a cookie.
Recipe FAQs
- → What causes the soft texture in these cookies?
The combination of creamy peanut butter, butter, and sugars helps retain moisture, resulting in a soft and chewy texture after baking.
- → Why is there a crosshatch pattern on the cookies?
The crosshatch is created by pressing a fork twice on each dough ball before baking. This flattens the cookies evenly and adds a distinctive texture and look.
- → Can I use crunchy peanut butter instead?
Yes, using crunchy peanut butter adds extra texture with bits of peanuts throughout the cookies.
- → How do I make the edges crispier?
Bake the cookies 1 to 2 minutes longer until the edges turn slightly golden, while the centers remain soft.
- → Are these cookies suitable for vegetarians?
Yes, the ingredients used are vegetarian-friendly, containing no meat or animal-derived gelatin.
- → Can these cookies be stored, and for how long?
Store the cookies in an airtight container at room temperature for up to one week to maintain freshness.