 Pin It
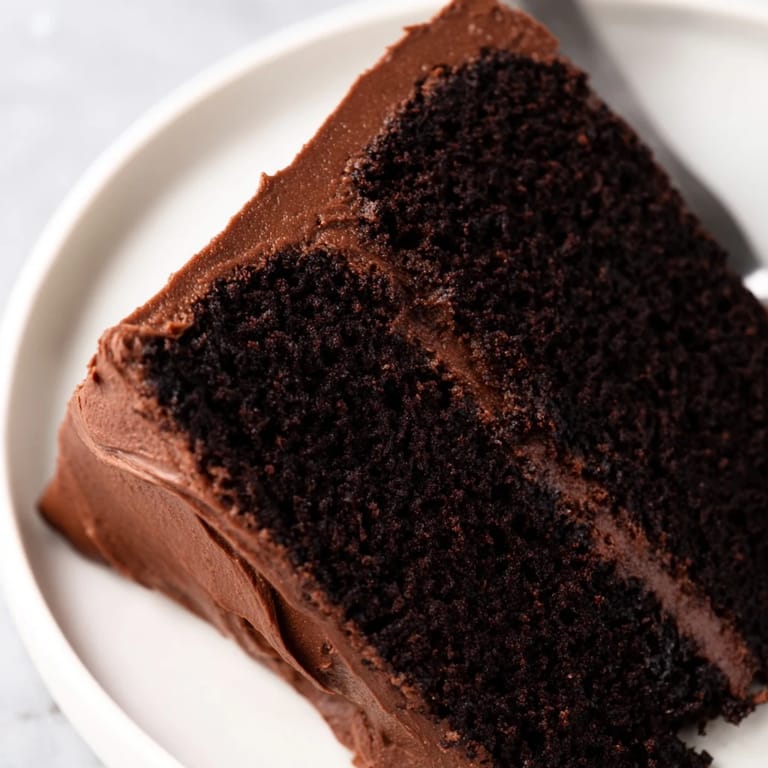
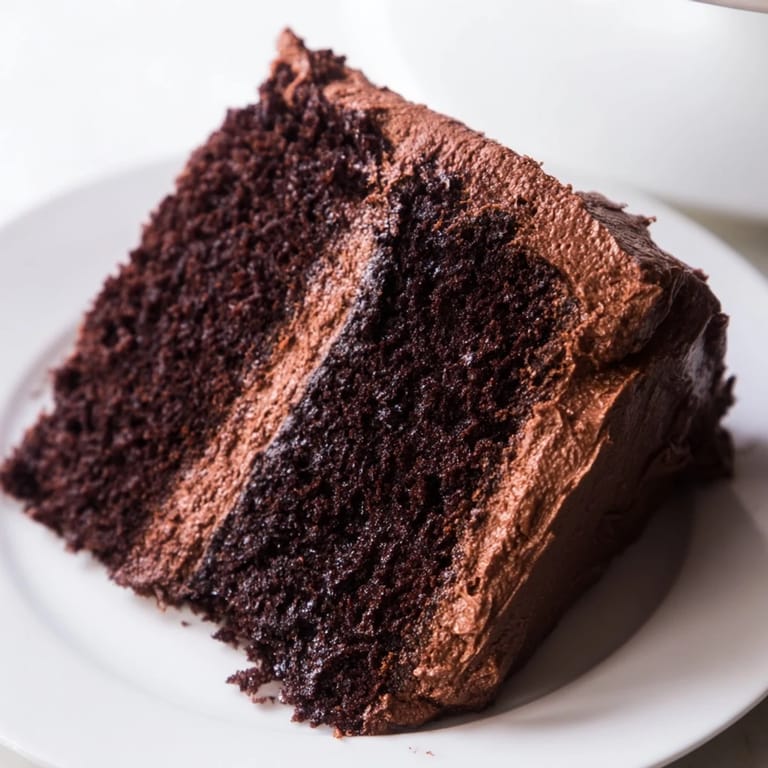
 There's something about the smell of chocolate cake baking that stops time in the kitchen. I first made Devil's Food Cake on a rainy afternoon when my sister called saying she'd just gotten engaged, and I wanted to do something special before she came over with her fiancé. I'd never attempted a layer cake before, but I had this old recipe card with notes scrawled in my grandmother's handwriting, and something about the promise of boiling water mixed into the batter intrigued me. When I pulled those layers from the oven, they were impossibly dark and tender, and I knew I'd found something worth making again and again.
I'll never forget frosting this cake for the first time while my sister sat on the kitchen counter, telling me all about her plans. My hands were shaking a little as I crumb-coated the layers, worried I'd mess it up, but the frosting was so forgiving and delicious that I found myself stealing tastes between every pass of the spatula. By the time we sliced into it, three people had gathered in the kitchen drawn by the smell alone, and we all sat there eating straight from the cake with forks.
Ingredients
- All-purpose flour: This is your cake's structure, so measure it right—spoon into the cup and level it off rather than scooping straight from the bag.
- Unsweetened cocoa powder (Dutch-processed preferred): Dutch cocoa has a deeper, less acidic flavor than natural cocoa, which is why the batter comes together so smoothly.
- Granulated sugar: Not just sweetness—it helps hold moisture in the cake and gives the crumb its tender structure.
- Baking powder and baking soda: You need both; the baking soda reacts with the cocoa's acidity while the baking powder gives you lift, and together they're what makes this cake rise so perfectly.
- Boiling water: This is the secret weapon that seemed weird to me until I realized it blooms the cocoa flavor and creates that signature moist crumb.
- Vegetable oil: Oil keeps the cake tender longer than butter alone, which is why this cake stays fresh for days.
- Unsalted butter: For the frosting, softened butter whips into clouds when you beat it, trapping air that makes the frosting light and spreadable.
- Powdered sugar and cocoa powder for frosting: The sifting step matters here—lumps in your frosting will show up on the finished cake, so don't skip it.
Tired of Takeout? 🥡
Get 10 meals you can make faster than delivery arrives. Seriously.
One email. No spam. Unsubscribe anytime.
Instructions
- Prep your pans like you mean it:
- Grease those 9-inch rounds generously and line them with parchment—this cake is delicate when warm, and you don't want it sticking. Preheat to 350°F so the oven is ready the moment you pour batter in.
- Sift your dry ingredients together:
- This feels like an extra step, but sifting aerates the flour and cocoa and helps everything combine evenly. Use a whisk or sifter, and don't rush it.
- Mix the wet and dry:
- Combine eggs, milk, oil, and vanilla with your flour mixture on medium speed just until you don't see streaks of dry flour anymore. Overmixing toughens the crumb, so stop as soon as everything looks combined.
- Add the boiling water carefully:
- Lower the mixer speed and add that hot water slowly—yes, the batter will look impossibly thin and soupy. That's exactly right. The water will cook the starches slightly and create the moisture magic this cake is known for.
- Bake until a toothpick comes clean:
- At 28 to 32 minutes, your kitchen will smell insane, and the cake should spring back slightly when you touch the top. A toothpick inserted in the center should have no wet batter clinging to it, though a few moist crumbs are okay.
- Cool with patience:
- Let the cakes rest in their pans for 10 minutes—this firms them up enough to turn out without falling apart. Then run a knife around the edges, flip them onto wire racks, and let them cool completely before frosting.
- Make the frosting a velvety dream:
- Beat softened butter until it's pale and fluffy, about 2 minutes, then gradually add your sifted powdered sugar and cocoa powder. This gradual approach prevents flour clouds from exploding everywhere. Once it's smooth, add milk and vanilla and beat until it's light and spreadable.
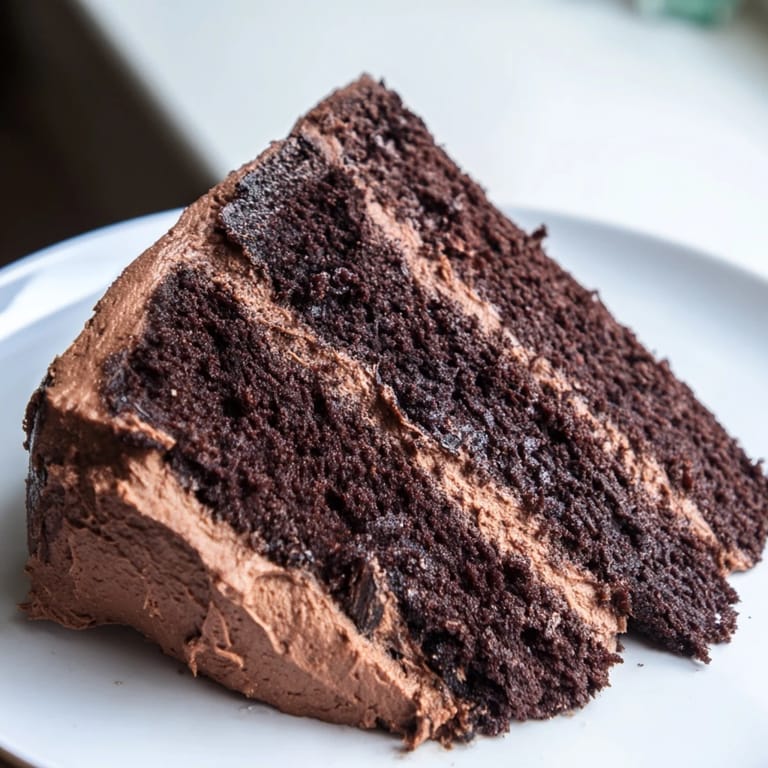
- Layer and frost with confidence:
- Place one cake on your serving plate and spread a generous layer of frosting across the top. Top with the second layer, then crumb coat the whole thing with a thin frosting layer before doing your final coat for a professional-looking finish.
 Pin It
 I made this cake for a small dinner party years later, and one of my friends asked for the recipe right there at the table, mid-bite. That moment felt like a badge of honor—this wasn't just a dessert anymore, it was something that meant something to people. Every time I smell that chocolate baking now, I think of all the occasions it's been part of, all the celebrations and quiet afternoons when someone needed comfort food.
Why the Boiling Water Matters
The boiling water is the detail that separates a good chocolate cake from a transcendent one. When hot water hits the cocoa powder, it blooms the flavor and releases oils that would otherwise stay dormant, creating depth and richness that tastes expensive. The water also keeps the batter thin enough that when it bakes, the crumb stays tender and doesn't dry out, which is why this cake stays soft even after a few days sitting on the counter.
Frosting Like a Professional
The frosting is where this cake becomes special, and it's surprisingly forgiving once you understand the technique. Sifting the powdered sugar and cocoa prevents lumps that would make your frosting grainy, and beating the butter first incorporates air that keeps the frosting from feeling heavy. If you find your frosting is too stiff, add milk a tablespoon at a time and keep beating—more beating usually solves consistency problems better than adding more liquid.
Making It Your Own
This cake is beautiful on its own, but it also loves company and experimentation. Some of my favorite variations have come from adding things without overthinking it—a splash of brewed coffee in place of some boiling water deepens the chocolate, while a layer of chocolate ganache between the cakes turns it into something truly decadent. I've also topped it with crushed chocolate cookies, sprinkled cocoa powder over the frosting for drama, and even added a drizzle of salted caramel for a sweet-salty surprise.
- Replace half the boiling water with strong brewed coffee for an intensified chocolate flavor that's almost mysterious.
- Try adding a thin layer of chocolate ganache between the cakes for extra richness, or swirl some into the frosting for visual interest.
- Store the finished cake covered at room temperature for up to 2 days, or in the refrigerator for up to 5 days for a fudgier, denser crumb.
 Pin It
 This cake has become the dessert I turn to when I want to impress someone or when I need to remember why I love baking in the first place. It's dark, rich, and forgiving, and it tastes like comfort tastes.
Recipe FAQs
- → What makes the cake so moist?
The addition of boiling water and vegetable oil helps create a tender crumb and moist texture.
- → Can I substitute ingredients in the frosting?
Yes, you can adjust milk quantity to reach desired frosting consistency and use salted butter for a slight flavor variation.
- → How do I ensure even baking?
Use parchment-lined pans and bake at 350°F until a toothpick comes out clean, around 28–32 minutes.
- → What enhances the chocolate flavor?
Using Dutch-processed cocoa and optionally replacing boiling water with brewed coffee intensifies the chocolate notes.
- → How should leftovers be stored?
Keep covered at room temperature for up to 2 days or refrigerate, well wrapped, up to 5 days.
- → Are there any common allergens?
Contains wheat, eggs, and dairy. Check cocoa brands for potential soy traces.