 Pin It
 The first time I encountered Black Forest Cake wasn't in a German bakery but in my grandmother's kitchen on a rainy afternoon, watching her steady hands layer chocolate and cherries with the kind of precision that made it look effortless. She told me the cake was born in the Black Forest region of Germany, where cherry orchards sprawl across misty hillsides, and that every layer told a story of patience and care. That day, I learned it wasn't just about the ingredients—it was about the moment when everything came together, when the aroma of dark chocolate mixed with tart cherry syrup filled the room and suddenly you understood why this dessert had lasted generations. Now, whenever I make it, I'm transported back to that kitchen, her voice guiding my hands through each step.
I remember bringing this cake to a dinner party and watching a friend take that first bite—her eyes closed for a second, and without saying anything, she just smiled. That's when I realized this cake does something special; it breaks through polite conversation and reminds people why they fell in love with dessert in the first place. The layers revealed themselves on her fork, each one distinct yet harmonious, and suddenly everyone wanted the recipe. It became the cake I'm known for, the one people ask about months later.
Ingredients
- All-purpose flour (1 cup/120 g): The foundation of structure; sifting it with the cocoa powder prevents lumps that can make the crumb dense.
- Granulated sugar (1 cup/200 g): Dissolves into the batter to create moisture and tender crumb; don't skip sifting this with the flour.
- Unsweetened cocoa powder (1/2 cup/60 g): Choose a good quality Dutch-processed cocoa for deeper, more elegant flavor that doesn't taste bitter.
- Baking powder and baking soda (1 1/2 tsp and 1/2 tsp): Work together to lift the batter; they're what makes this cake surprisingly light despite all that chocolate.
- Eggs (2 large): Bring them to room temperature for better emulsification with the oil; this creates a more tender cake.
- Whole milk (1/2 cup/120 ml): The liquid component that activates the leaveners and keeps the crumb moist without heaviness.
- Vegetable oil (1/2 cup/120 ml): Use a neutral oil; it keeps the cake more tender and moist than butter alone would.
- Vanilla extract (2 tsp for cake, 1 tsp for cream): A small amount rounds out the chocolate flavor without making it taste like vanilla cake.
- Boiling water (1/2 cup/120 ml): The secret weapon that intensifies the chocolate flavor and creates an incredibly moist crumb.
- Dark sweet cherries (2 cups/350 g): Fresh or jarred both work beautifully; jarred is often easier and the syrup becomes part of your filling.
- Cherry juice or syrup (1/2 cup/120 ml): This brushed between layers adds moisture and keeps the cake tender for days.
- Kirsch or cherry brandy (2 tbsp, optional): A small splash elevates the filling from homemade to sophisticated; skip it if you prefer alcohol-free.
- Heavy whipping cream (2 cups/480 ml): Must be truly cold; chill the bowl and beaters beforehand for stiff, beautiful peaks.
- Powdered sugar (1/2 cup/60 g): Dissolves seamlessly into cream without grittiness, unlike granulated sugar.
- Dark chocolate (3 oz/85 g): For shavings; use a vegetable peeler on a bar that's been left at room temperature for just a few minutes.
Tired of Takeout? 🥡
Get 10 meals you can make faster than delivery arrives. Seriously.
One email. No spam. Unsubscribe anytime.
Instructions
- Prep your pans and heat the oven:
- Set your oven to 350°F (175°C) and position the rack in the middle. Grease two 8-inch round pans with butter or oil, then line the bottoms with parchment paper; this step prevents sticking and lets you turn out perfect layers.
- Combine dry ingredients:
- Sift together the flour, sugar, cocoa powder, baking powder, baking soda, and salt into a large bowl. Sifting aerates the cocoa and prevents lumps that would ruin the texture.
- Add wet ingredients and mix:
- Add the eggs, milk, oil, and vanilla to the dry mixture and beat on medium speed until smooth and combined, about 1 minute. Don't overmix at this stage or the cake will be tough.
- Add boiling water:
- Gradually pour in the boiling water while mixing on low speed; the batter will look thin and almost soup-like, but this is exactly what creates the incredibly moist crumb. Trust this step.
- Bake the layers:
- Divide the batter evenly between the prepared pans and bake for 30–35 minutes, until a toothpick inserted in the center comes out clean. The tops should spring back gently when touched.
- Cool the cakes:
- Leave the cakes in their pans for exactly 10 minutes; this allows them to set just enough to turn out without breaking. Then invert onto wire racks and cool completely before assembly, about 1 hour.
- Prepare the cherry filling:
- In a small saucepan, combine the pitted cherries, cherry juice, and sugar over medium heat. Bring to a gentle simmer, then stir in the cornstarch mixture and cook for 2–3 minutes until thickened. Remove from heat, add kirsch if using, and let cool to room temperature.
- Whip the cream:
- Pour cold heavy cream into a chilled bowl and beat on high speed with chilled beaters until soft peaks form. Add powdered sugar and vanilla, then continue beating until stiff peaks form; be careful not to overbeat or you'll have butter.
- Slice the layers:
- Using a sharp serrated knife, carefully slice each cake layer horizontally in half, creating four thin layers total. A gentle sawing motion works better than pressing down.
- Brush and fill:
- Place one layer on your serving plate and brush lightly with the cherry syrup. Spread a layer of cherry filling over it, then a layer of whipped cream.
- Repeat and frost:
- Continue layering in this pattern: cake, syrup, cherries, cream, until all four layers are stacked and you finish with a generous layer of whipped cream on top and sides. An offset spatula makes this beautiful and easy.
- Decorate and chill:
- Top with chocolate shavings and place fresh or maraschino cherries around the top edge. Refrigerate for at least 1 hour before serving; this helps the layers set and makes slicing clean.
 Pin It
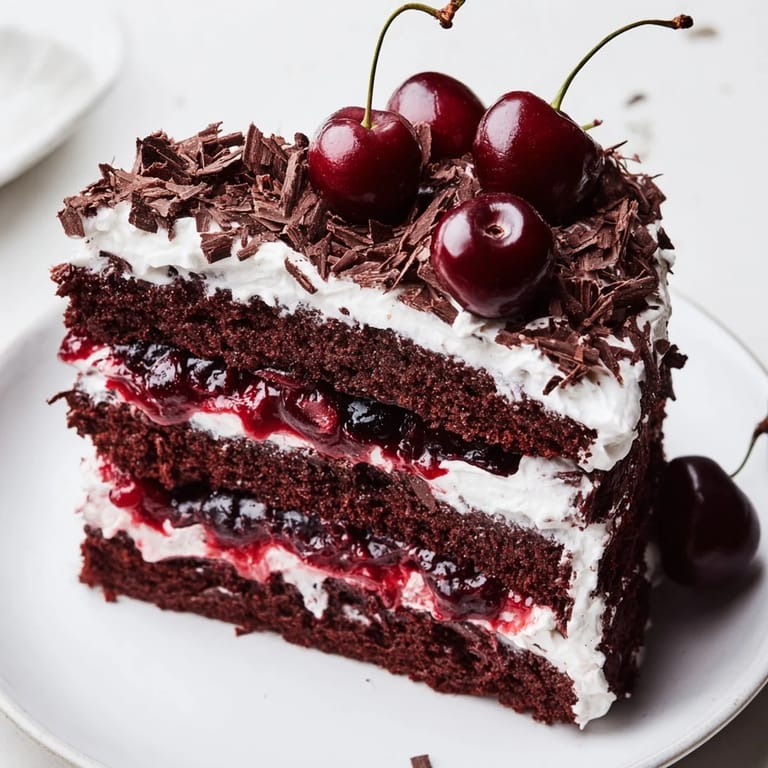
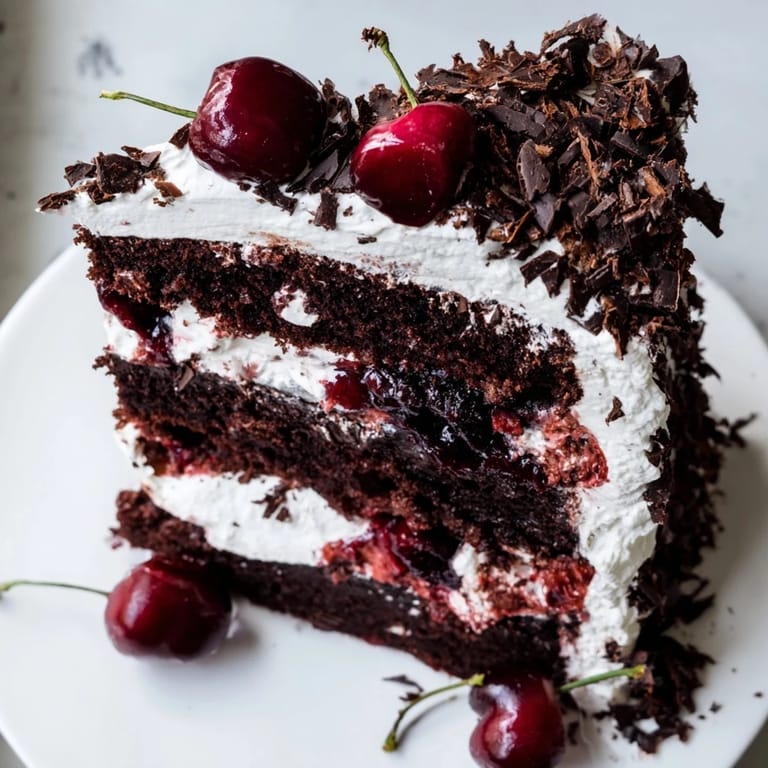
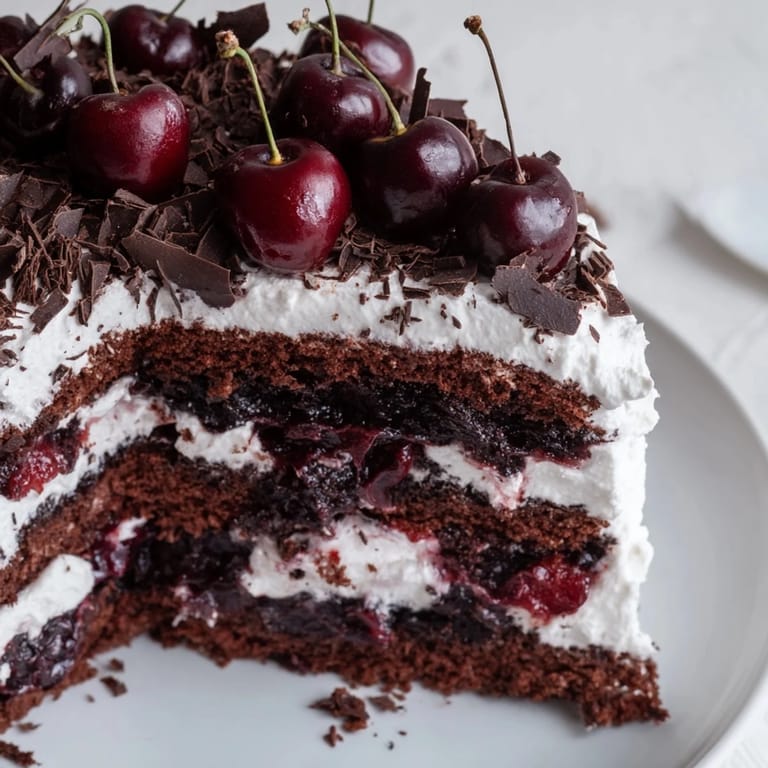
 There's a moment right before you serve Black Forest Cake when you step back and see it complete—the glossy chocolate shavings catching the light, the cherries like jewels on snow—and you realize you've created something beautiful enough to matter. That moment, when someone pulls out their phone to photograph it before eating, when the first slice reveals those perfect layers—that's when this cake becomes more than dessert. It becomes a small act of love on a plate.
Mastering the Layer
The key to a stunning Black Forest Cake is understanding that each layer has its own job to do. The cake provides structure and chocolate depth, the cherry filling adds brightness and moisture, and the whipped cream creates airiness and visual drama. When you brush the syrup between layers, you're not just adding flavor—you're creating insurance against a dry cake that sits in the fridge for a day or two. I learned this the hard way after making a cake that was beautiful on day one but disappointingly dry by day two; now I brush generously and never look back. The magic happens when these three components work in balance, each one distinct on the palate but inseparable in purpose.
About Cherries and Kirsch
Cherries are the soul of this cake, and they deserve respect. Fresh dark sweet cherries in summer are spectacular, but jarred cherries are honestly more reliable and their syrup is liquid gold for brushing and filling. Kirsch—that clear cherry brandy—adds a sophisticated note that makes people ask what your secret is, but it's entirely optional and the cake is equally beautiful without it. I once made this for someone avoiding alcohol and used an extra tablespoon of cherry syrup instead; nobody missed the kirsch because the cherry flavor was already so present. The choice is yours, but whichever path you take, commit to it fully.
Chocolate Shavings and Finishing Touches
The chocolate shavings are the jewelry on this dessert, and they're easier to create than most people think. Use a vegetable peeler on a bar of good quality dark chocolate that's been left on the counter for just a few minutes—not too cold or it will shatter, not too warm or it will smear. The cherries on top should be placed thoughtfully, like you're composing a small edible still life. This final step takes five minutes but elevates everything before it. A few quick reminders: work quickly so the cream doesn't warm up, keep your work surface clean so chocolate shavings stay pristine, and remember that imperfection is part of the charm.
- Don't refrigerate the chocolate bar; let it sit at room temperature for a few minutes before shaving.
- If your shavings break into smaller pieces, use them anyway—they catch light beautifully and taste just as good.
- Place the cake back in the fridge for 15 minutes after decorating so the whipped cream sets and holds the shavings in place.
 Pin It
 Black Forest Cake isn't just a dessert—it's a conversation starter, a showstopper, a love letter made with flour and cherries. Once you've made it once, you'll understand why it's endured for generations.
Recipe FAQs
- → What type of cherries work best for the filling?
Fresh or jarred dark sweet cherries are recommended for a rich, tangy filling that balances the chocolate layers.
- → How can I achieve fluffy whipped cream for layering?
Use cold heavy cream and beat on high speed until stiff peaks form. Chilling the bowl beforehand helps achieve optimal texture.
- → What is the purpose of kirsch in the cherry filling?
Kirsch adds a subtle cherry brandy flavor enhancing the overall taste, but it’s optional and can be omitted for an alcohol-free version.
- → How do I prevent the cake from drying out during baking?
Ensure precise baking times and cool the layers completely before assembly to retain moisture and prevent dryness.
- → Can I substitute the cocoa powder with another ingredient?
Unsweetened cocoa powder is key for the chocolate flavor; substitutions may alter taste and texture significantly.